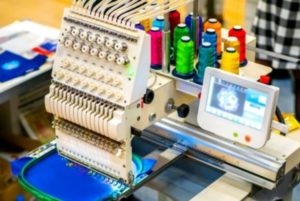
Different sewing machines already have designs programmed into them. If you don’t like the programmed designs, you can add them further to the list. The process is easy, and you have to install them from a USB or a disk, depending on the system’s format. There is no problem in finding new designs as some are available for free online while others can be purchased.
There is a whole range of designs available on the market, and you will find one that suits your choice. Here is a brief overview of how to transfer embroidery designs from computer to sewing machine.
Table of Contents
Downloading and processing the Data
The first step in importing new designs to the machine is their selection. There are sewing machines that come with various designs programmed into their system. At the same time, some might also have a CD or USB that has designs in a software form and can be used by the machine is transferred to it. But the users’ choices vary, and they might not find the designs per their choice.
So, the easy solution to this is to visit online stores for embroidery designs. Once you have finalized a design, you can select it and purchase it from the online store. Once it is downloaded, the next step is to save it in the unzipped form on your PC, in case it is in a zipped folder. You can also check the designs to see if they are the best fit for the fabric you want to work on.
The next step is to copy this data to the USB used to copy the design into the machine.
Transferring the Design to the Machine
Once you have copied the design, you have to connect the USB to the machine, which will process the data. Before you copy the data to the machine, you have to be careful to see if it is the supported format for your machine. Now, you also have to check the machine’s readability and see if its system can read the file.
If the design is shown on the machine screen after connecting the USB, it is readable. If the machine cannot read the design, you have to change it. When you are sure that the design works for the machine, you can copy it there.
Using the Embroidery Designs
Now, the important task for you is using the embroidery design that you have just transferred to the machine. In most sewing machines, there are three options that the user can avail. EXP, INF, BMP; in these, EXP refers to the design, INF is about the thread colors that the machine will use, and the BMP will show the picture of the design.
You can select any of the designs available in the machine and use them on the fabric that you have selected. As fabric color is available, you can choose any color that best matches your choice. So, the process is simple and doesn’t require any expertise in computers or sewing.
Final Thoughts
The transfer of embroidery design from the computer to the sewing machine is simple. You have to find the design of your choice on the internet or any other source and then extract it on your PC. The next step for you is to transfer that design into a USB and connect that USB to your sewing machine. After completing this step, you can access the design on the sewing machine. If the machine can read the design, you are good to go.