 Your sewing machine can perform well-properly if you cover it while it is not in use.
The sewing machine cover helps keep it efficient and ensures that dust doesn’t affect its body.
Finding a convenient cover for your sewing machine is not always easy.
Ofttimes when you find it, it is either not fitting or made up of some hard material that doesn’t serve the purpose.
Usually, there are a lot of problems with ready-made sewing machine covers. It is easy to make a protective cover for the sewing machine.
Making a cover for a sewing machine is discussed here in detail.
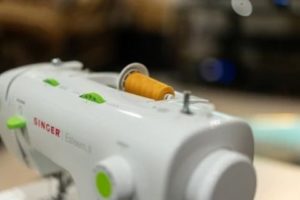
Sewing Machine Cover – An Introduction
If you want to protect your sewing machine from a host of problems, then the best solution is to use a covering for it.
As said above, there is a range of solutions available to tackle this problem, but not all of them are perfect.
The problem is worsened if you have kids at home who fiddle with it.
It is better to keep the machine safe from them, and a cover can help with this job.
A beautiful cover will add to the beauty of the machine and keep it safe from kids.
There are a lot of benefits of using a cover on a machine.
If you use it yourself, making a cover is not difficult. All that you need to do is fetch a piece of cloth and cut it accordingly to cover the machine.
If you want to show more love to your machine, you can also work on patterns on cloth.
It depends on you how to make productive use of a machine to make a cover for it.
Here, in the following section, we talk briefly about making a cover for a sewing machine.
How to make a sewing machine cover?
It is better to work on the making process for a sewing machine cover in a systematic manner.
If you start it haphazardly, you might not handle it properly.
Therefore, it is better that you do it in the following pattern.
Taking Measurement
The first step is to take measurements of different areas/dimensions of the machine to ensure that all parts are covered properly.
These dimensions include the height of the machine, width, depth of it, the handle width and length, foot control dimensions, etc.
Once you have taken measurements of the machine’s dimensions, not them on a piece.
The noted measurements will help with accuracy in cutting the cloth for it.
Cutting Cloth Pieces for the Cover
The next step is cutting the cloth for cover. Take the cloth piece and then cut the required pieces, ensuring that they don’t fall short due to stitching.
Once you have cut all pieces, put them aside and mark them to not mix up.
Binding Pieces
After cutting the cloth pieces, you have to bind them in the required pattern.
Be careful in arranging the cloth so that you don’t stitch the wrong pieces.
Once you have completed the stitching process, you have to check if the cover fits well on the machine.
If it does, you can proceed ahead, and if it doesn’t, you have to find out where the fault is.
The stitching process will bind the pocket pieces to the main cover. Then the other parts are to be stitched to the main cover.
The sides and edges should also be stitched so that they don’t lose thread with time.
Work on a Design
If the cover fits the machine well, you can stitch a design piece or pockets on it.
There is a wide variety of designs available which can be used with the cover. You can choose a design of your choice on the cover.
Refining the Stitches
The next step is to refine the stitches by removing the dangling thread and edges.
This step will refine the cover into a presentable piece.
Final Thoughts
The process of making a sewing machine cover is easy.
It can be used to make a cover of choice for your sewing machine.
You can design a cover based on your choice and the needs of the machine.
It will be better regarding fitting and the expenses and protection of the machine.